Friday, July 26, 2019

Freebie Friday

Hello everyone!  I wanted to share this simple card I recently shared with a group of my fellow demonstrators!  It is so very simple to do - but is so happy too!  So here are the details for you! And don't forget to click that SHOP NOW button to get the items you need to recreate this yourself!  You will LOVE it!!!

Stampin’ Up! Supplies:
·         STAMPS – Daisy Lane (149325),
·         PAPER – Crushed Curry Cardstock (131199), Whisper White Cardstock (100730)
·         INK – Crushed Curry Classic Stampin’ Pad (147087), Old Olive Classic Stampin’ Pad (147090)
·         OTHER – 3/8” Crushed Curry Crinkled Seam Binding Ribbon (149444), Multipurpose Liquid Glue (110755), Stampin’ Dimensionals (104430)
           
Cutting & Scoring: 
·         Whisper White cardstock 11” x 4-1/4”, scored at 5-1/2”; 5” x 3-3/4”
·         Crushed Curry cardstock 5-1/4” x 4”
·         12” Crinkled Seam Binding Ribbon
                       
Instructions:
·        Fold Whisper White cardstock on the score line.
·        Stamp the stem using Old Olive Classic Stampin’ Pad on the Whisper White 5” x 3-3/4” layer.  Using the Crushed Curry Classic Stampin’ Pad, stamp the small flower and sentiment onto the Whisper White layer
·        Wrap Crushed Curry ribbon around the Whisper White layer and tie in a bow. Trim off excess ribbon as needed.
·        Adhere the stamped layer to the Crushed Curry 5*1/4” x 4” piece of cardstock using Multipurpose Glue.
·        Adhere Crushed Curry layer to card base using Stampin’ Dimensionals.


Product List

Friday, June 21, 2019

Freebie Friday


Here is a special gift for you - one of my lastest creations!  I love this new Inspiring Iris set and am so happy with the way the flowers turn out!  My grandmother's name was Iris - so I am kinda partial to this set and look forward to using it alot!  For now - my first one for you :-) I hope you like what you see and I would love your business if you would like to purchase anything!  Just click that SHOP NOW button to head to my store!  


Stampin’ Up! Supplies:
·         STAMPS – Inspiring Iris (149268),
·         PAPER – Gorgeous Grape Cardstock (146987), Highland Heather Cardstock (146986), Whisper White         Cardstock (100730)
·         INK – Highland Heather Classic Stampin’ Pad (147103), Pear Pizzaz Classic Stampin’ Pad (147104), Memento Pad (132708), Highland Heather Stampin’ Blend – Dark (146883)
·         OTHER – 3/8” Metallic-Edge Ribbon Silver (144213), Multipurpose Liquid Glue (110755), Stampin’ Dimensionals (104430)
           
Cutting & Scoring: 
·         Gorgeous Grape 11” x 4-1/4”, scored at 5-1/2”
·         Highland Heather 5” x 3-3/4”; 3-1/16” x 3-1/16”
·         Whisper White 4-15/16” x 3-13/16”; 3” x 3”
·         12” Metallic-Edge Ribbon
                       
Instructions:
·         Fold Gorgeous Grape cardstock on the score line.
·         Using the Highland Heather Stampin’ Blend – Dark, color the Metallic-Edge Ribbon and set aside to dry.
·         Stamp the outline on the 3” square of Whisper White using the Memento Pad. Stamp the inside of iris flower       using Highland Heather Classic Stampin’ Pad and stamp the leaves using the Pear Pizzzaz Classic Stampin’ Pad.
·         Adhere the stamped layer to the Highland Heather square using Multipurpose Glue. .
·         Stamp sentiment at bottom of 4-15/16”x3-13/16” piece of Whisper White using the Highland Heather Classic Stampin’ Pad.  Adhere the Whisper White cardstock to the Highland Heather 5”x3-3/4” piece.
·         Adhere square layer to larger layer using Stampin’ Dimensionals.
·         Tie bow around entire layer using the colored Metallic-Edge Ribbon.
Adhere entire layered piece to cardbase using Stampin’ Dimensionals.


Product List

Friday, April 19, 2019

Saying Bon Voyage to retiring products!


It is that time of year in Stampin' Up! world! Time for us to start saying goodbye to products that will be retiring from our Annual and Occasions Catalogs! BUT we will begin to welcome some great new items and colors into our lives (and can I just say...I am over the moon excited about the new catalog coming up in June!!!) 

So I am posting this link to show you what is leaving...but don't fret if it looks like your favorite stamp set is retiring...we are switching stamp styles from wood and clear mount to cling mount so your favorite set my still be around but in a different style! Feel free to ask me if you have questions and I will be happy to help you out! Please keep in mind that if you see something you like....don't wait as items that are retiring are on first-come, first-served basis and you don't want to miss out!!!

Retirement list! Shop at www.softspotstamping.com!

Friday, March 22, 2019

Free Friday Download

Happy Friday and HAPPY SPRING!!! Happy to be able to get in and out of places without fear of slipping on ice!!!

As promised, here is your Free Friday Download!  Hope you like it! 


Stampin’ Up! Supplies:
STAMPS – Amazing Life (148750 photopolymer)
PAPER – Whisper White Thick Cardstock (140272), Lemon Lime Twist Cardstock (144245)
INK – Memento Pad (132708), Blushing Bride Stampin’ Write Marker (part of 147156), Lemon Lime Twist Stampin’ Write Marker (part of 144033)
OTHER – Rectangle Stitched Framelits Dies (148551), ¼” Ombre Ribbon Lemon Lime Twist (144234), Big Shot (143263), Stampin’ Dimensionals (104430), Clear Block E (118484), Mini Glue Dots (103683)
           
Cutting & Scoring:
Whisper White Thick Card Stock 5-1/2” x 8-1/2”, scored at 4-1/4”
Lemon Lime Twist 5-1/4” x 4”


Instructions:
Fold 5-1/2” x 8-1/2” Whisper White Thick Cardstock on score line to use as base.
Use the 3-1/8” x 4-1/2” rectangle from Rectangle Stitched Framelits Dies to cut a frame from the Lemon Lime Twist layer.  (Hint:  keep the rectangle to use in a later project!)
Stamp sentiment from Amazing Life in center of Whisper White cardbase.
Using the Stampin’ Write Markers, color in the word “Happy” and the banner.
Use Stampin’ Dimensionals to adhere Lemon Lime Twist frame to the card base so that the sentiment is in the center of the frame.
Tie a bow with the Lemon Lime Twist Ombre ribbon and adhere to the card using Mini Glue Dot.


Friday, March 8, 2019

Free Friday Download March 8, 2019

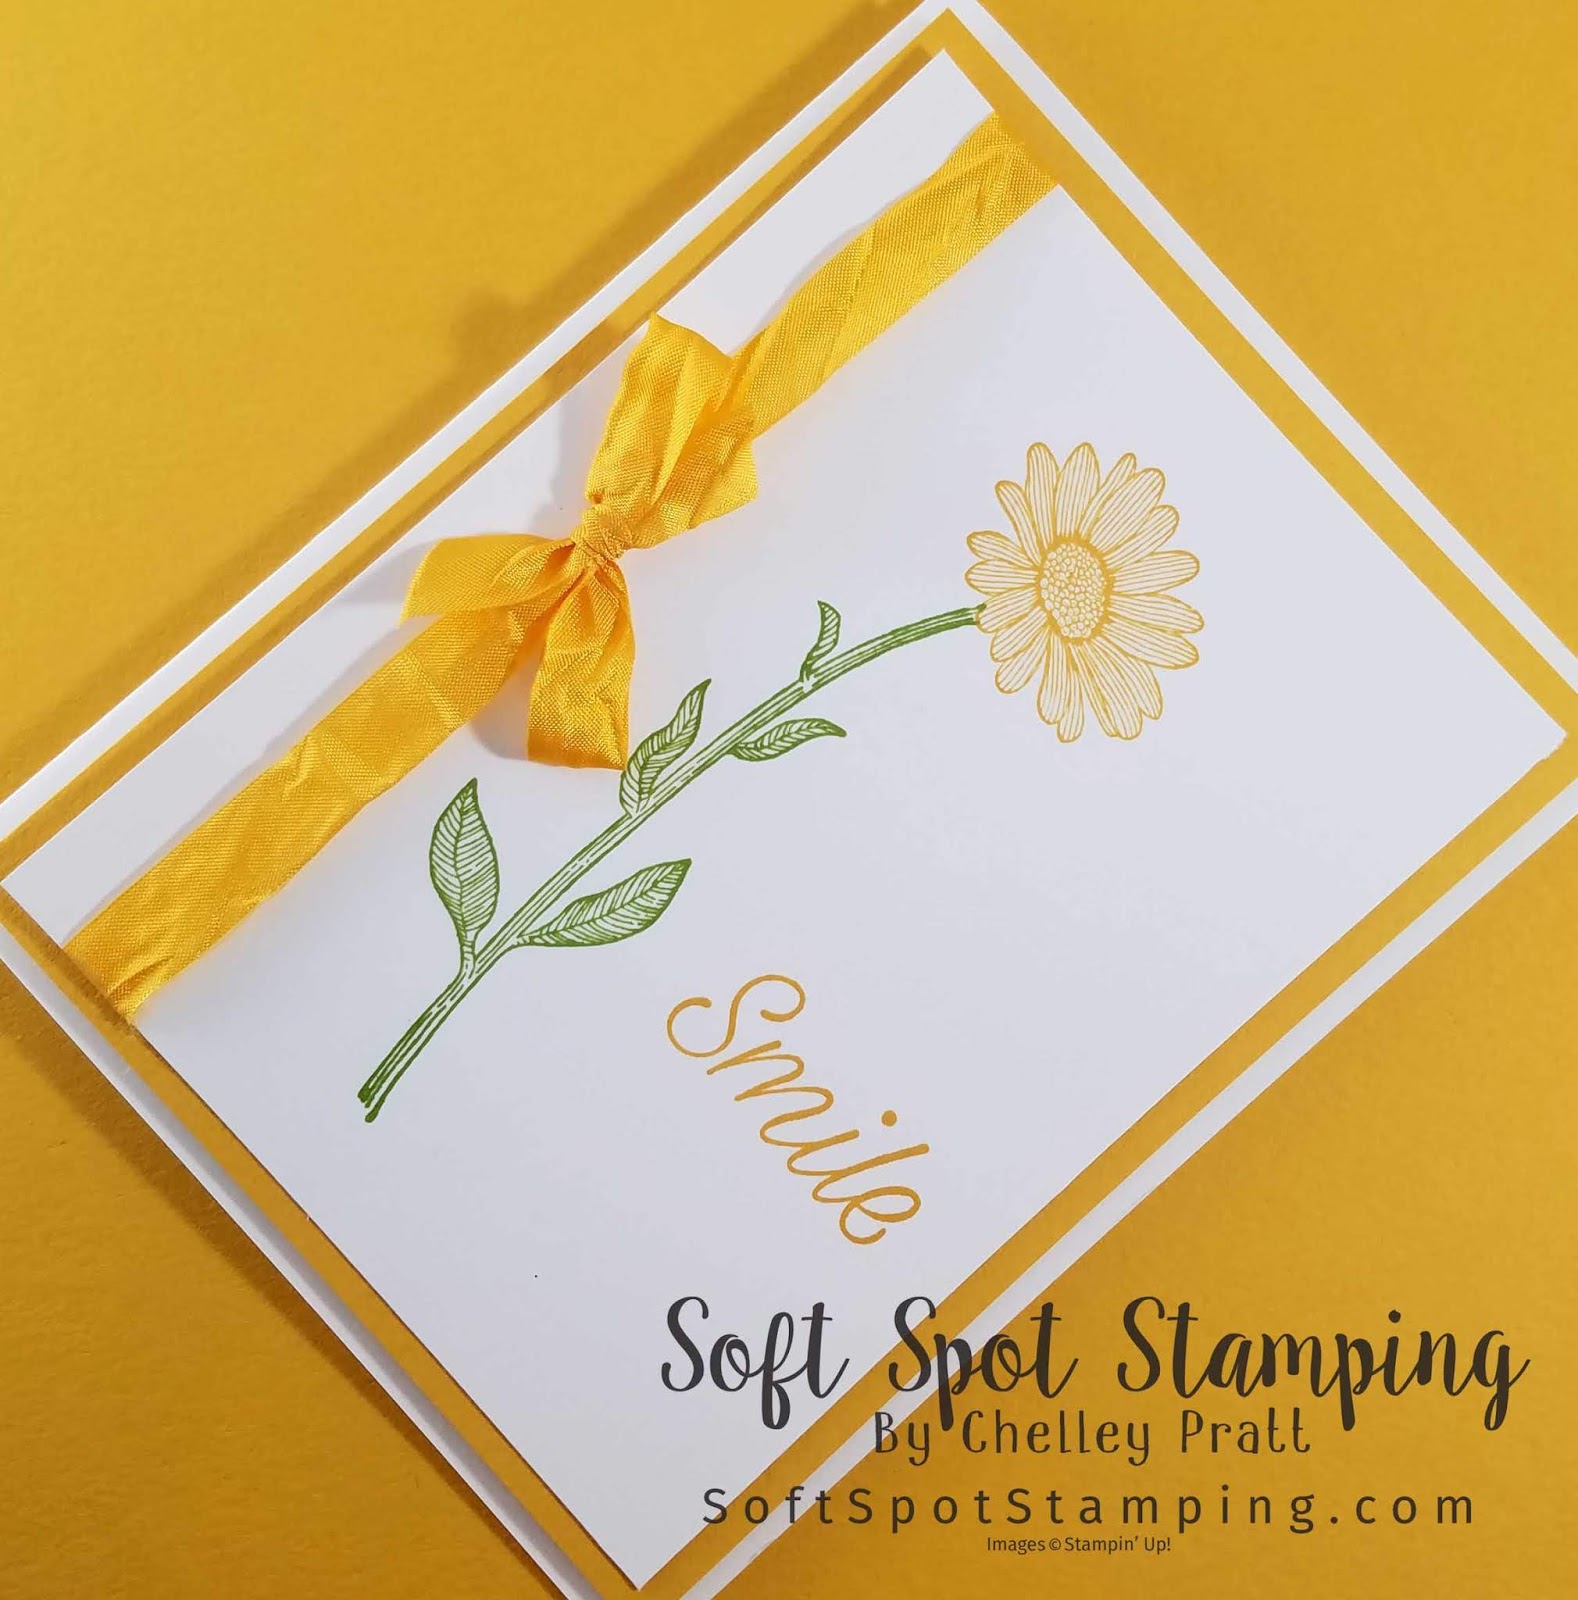
It's Friday!  And you get something for FREE!!!  Here is your FREE Friday Download!  Be sure to click the SHOP NOW button to purchase what you need to make this great card! I just love how bright and cheery this card is!


Stampin’ Up! Supplies:
·      STAMPS – Vibrant Vases (photopolymer 148656)
·      PAPER – Thick Whisper White (140272), Night of Navy (100867), Pineapple Punch (146971), Poppy Parade (119793), Whisper White (100730), Neutrals 6 x 6 Designer Series Paper (146967)
·      INK – Night of Navy (147110), Pineapple Punch (147141), Poppy Parade (147050), Granny Apple Green (147095)
·      OTHER – Big Shot (143263), Vases Builder Punch (147040), Swirls & Curls Textured Impressions Embossing Folder (147923), Mini Striped Ribbon in Poppy Parade (146938), Mini Stampin’ Dimensionals (144108), Mini Glue Dots (103683), Stampin’ Dimensionals (104430)

Cutting & Scoring: 
·      Thick Whisper White – 11” x 4-1/4”, score and fold at 5-1/2”
·      Night of Navy – 5-3/8” x 4-1/8”
·      Pineapple Punch – 5-1/4” x 4”
·      Poppy Parade – 2-3/8” x 3-5/8”
·      Whisper White – 2-1/4” x 3-1/2”, scrap
Neutrals 6 x 6 Designer Series Paper – scraps for vases


Instructions:
·      Using the Swirls & Curls Textured Impressions Embossing Folder with the Pineapple Punch card stock layer, run it through the Big Shot.
·      Attach to the Night of Navy layer. Tie the ribbon around this layer and knot. Attach to the card base.
·      Stamp the sentiment from the Vibrant Vase stamp set in Night of Navy ink on the Whisper White layer. Stamp the straight line from the stamp set in Night of Navy ink above the sentiment.
·      Punch 3 different vases in the Neutrals Designer Series Paper with the Vases Builder Punch.
·      Estimate where the top of the vases will be and lightly mark with a pencil.
·      Using the flower bunch from the Vibrant vases stamp set, stamp the flower bunch in Night of Navy ink. Using two step stamping, stamp the inside of the flowers in Pineapple Punch. Stamp the leaves and the flower stems in Granny Apple Green.
·      Attach the two outer punched vases to the Whisper White later. Using Mini Stampin’ Dimensionals, attach the center vase.
·      On Whisper White scrap paper, stamp 3 tulips in Poppy Parade ink. Using two step stamping, stamp the inside of the tulips with Poppy Parade ink. Using the Vases Builder Punch, punch out the tulips. Attach the tulips to the stamped stems with Mini Glue Dots.
·      Attach the Whisper White layer to the Poppy Parade layer. Using Stampin’ Dimensionals, attach to the card base.


Sunday, March 3, 2019

Friday, March 1, 2019


FREE FRIDAY DOWNLOAD

Here's a cute card for you!!!


Stampin’ Up! Supplies:

  • STAMPS – So Hoppy Together (149725), Itty Bitty Birthday (146664W or 146667C)
  • PAPER –Lemon Lime Twist Cardstock (144245), Whisper White Thick Cardstock (140272), Whisper White Cardstock (100730), Poppy Parade Cardstock (119793), Gingham Gala Designer Series Paper (DSP) (148554)
  • INK – Memento Tuxedo Black (132708), Stampin’ Blends Combo Packs: Granny Apple Green (147274), Poppy Parade (147275)
  • OTHER – Big Shot (143263), Hop Around Framelits (150073), Classic Label Punch (141491), Poppy Parade ¼” Mini Striped Ribbon (146938), Stampin’ Dimensionals (104430), Mini Glue Dots (103683), Multipurpose Liquid Glue (110755)
           
Cutting & Scoring:  
  • Whisper White Thick - 8 ½” x 5 ½”, score and fold at 4 ¼”
  • Whisper White – 2” x 3”, scraps
  • Poppy Parade – 2 1/8” x 3 1/8”
  • Lemon Lime Twist – 2 3/8” x 3 3/8”
  • DSP Lemon Lime Twist – 2 ¼” x 3 ¼”   


Instructions:

  • Add Gingham Gala DSP to the layer of Lemon Lime Twist and then to the bottom of the card base.
  • Ink frog in Memento and stamp on a scrap, color with the Granny Apple Green and Poppy Parade Blends adding a small heart on the mouth.
  • Crop with the coordinating framelit, add to the white layer with dimensionals and then to the Poppy Parade layer and to the card base with dimensionals.
  • Stamp sentiment in Memento on a scrap of white and crop with the Classic Label Punch, add where shown with Mini Dimensionals.
  • Tie a bow with the Poppy Parade ribbon and add it above the frog with a glue dot. 


Love this?  Click the SHOP NOW button on the right to start shopping!  Need help?  Please contact me at softspotstamping@gmail.com!